Thursday, June 16, 2011

CAMERA MODE – MANUAL


This is the scary one, but well worth playing with as it will help you understand what changing various settings do.
In manual mode you have to set the aperture setting yourself and you have to set the shutter speed setting yourself. If the resulting exposure is wrong, then you are to blame, if it’s right then that’s a feather in your cap and you deserve a pat on the back.
So how do you know what are the right settings? That’s when experience comes in, and it is not something that can be learnt quickly. Experienced photographers will know that on a sunny day, with the camera set to an aperture of f8, that a certain shutter speed will generally give them a decent result but as there are so many variables to think about, it is a tricky thing to do. Luckily with digital you can experiment as much as you want without worrying about wasting film and money on learning and making mistakes.
As manual mode involves setting two parameters, it takes that bit longer to set the shot up, so if a quick shot is what’s required then a mode likeaperture priority or shutter priority might be the better option so you can concentrate more on getting the picture rather than worrying about settings.
On the other hand, if you have the time to set the shot up then using manual mode will teach you the most. Set the aperture and shutter speed, take a picture, review it and see if it looks ok. If it’s under exposed (too dark) then you might need to slow the shutter speed down a bit or maybe use a wider (smaller) aperture setting. If it’s over exposed (too light) then you will need to do the opposite, speed up the shutter speed or reduce the size of the aperture by choosing a larger aperture value.
I don’t want to dwell on manual mode too much at the moment, it’s a bit like running before you can walk, but I thought it needed to be mentioned. Don’t be scared of it, just remember that it needs a lot more thought and experience to get right.

LOOKING INTO THE FRAME


Another of the techniques I mentioned in my composition overview is a simple composition technique which works quite well and that is to give the subject of the image space to look into.
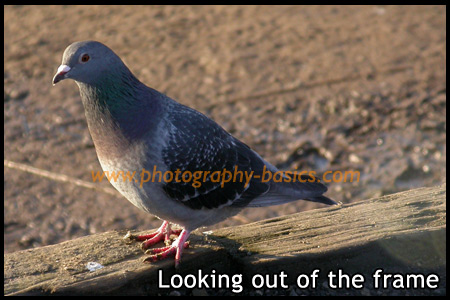
If you are taking pictures of people or animals and they are not looking directly at the camera, give them the space to look into. If you have them looking straight out of the frame, meaning the space is behind them, generally this image won’t be a pleasing composition to most people.
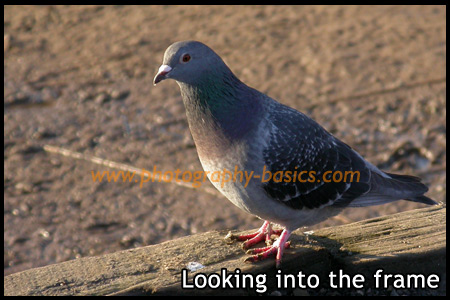
For instance, this pigeon in the first image is looking out of the frame, all the space is behind the bird and the image doesn’t really work.
Composition - Looking out of the frame
In the next image the pigeon is place to the right of the image and has space to look into making it a more pleasing image to most people.
Composition - Looking into the frame
It’s not just for people and animals. Anything that has movement in a particular direction should have space in the image to move into, rather than be moving out of the image. Motor sports is a good example of this. Of course, this is just another composition guideline, and sometimes the image can work if you break the ‘rules’.

Video Camera Shutter

The term shutter comes from still photography, where it describes a mechanical "door" between the camera lens and the film. When a photo is taken, the door opens for an instant and the film is exposed to the incoming light. The speed at which the shutter opens and closes can be varied — the faster the speed, the shorter the period of time the shutter is open, and the less light falls on the film.
Shutter speed is measured in fractions of a second. A speed of 1/60 second means that the shutter is open for one sixtieth of a second. A speed of 1/500 is faster, and 1/10000 is very fast indeed.
Video camera shutters work quite differently from still film camera shutters but the result is basically the same. (The technical difference is that, rather than using a mechanical device, the shutter speed is adjusted by electronically varying the amount of time the CCD is allowed to build a charge. If this means nothing to you, don't worry. It really doesn't matter how the shutter works, it's the effect it has that counts.)
The shutter "opens" and "closes" once for each frame of video; that is, 25 times per second for PAL and 30 times per second for NTSC. Thus, if a camera has its shutter set to 1/60, each frame will be exposed for 1/60 second. If the speed is increased to 1/120, each frame will be exposed for 1/120 of a second. Remember, the shutter speed does not affect the frame rate, which is completely separate and in most cases always stays the same1.
The main effect of higher shutter speeds is that individual frames appear sharper, due to the minimisation of motion blur. Motion blur occurs when the subject moves within the frame while the shutter is open. The less time the shutter is open (i.e. the faster the shutter speed), the less movement will take place.
One side-effect of higher shutter speeds is that movement appears more jerky. This is because motion blur tends to smooth consecutive frames together.
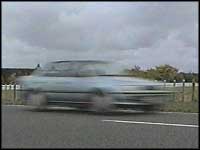
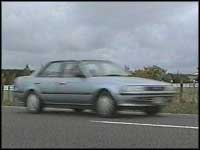
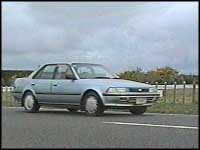
The three shots below were each taken as the car travelled past a stationary camera at 100 km/hr. With the shutter off, motion blur is most pronounced. As the shutter speed is increased, the image becomes sharper.
Shutter turned offShutter set to 1/120 second. Shutter set to 1/500 second.
Shutter Off1/120 second1/500 second
Higher shutter speeds are common in sports coverage. Watch any fast-action sport to see the "flickering" shutter effect. Notice how the slow-motion replays look, especially when they freeze the last frame.
Note: As a result of the reduced exposure time with high shutter speeds, the image may appear darker unless the iris is opened to compensate.

Shot Types

There is a convention in the video, film and television industries which assigns names and guidelines to common types of shots, framing and picture composition. The list below briefly describes the most common shot types.
Notes:
  • The exact terminology varies between production environments but the basic principles are the same.
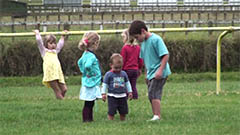
  • Shots are usually described in relation to a particular subject. In most of the examples below, the subject is the boy.
  • See below for more information and related tutorials.
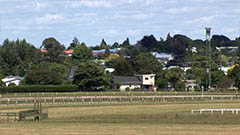
Extreme Wide Shot
EWS (Extreme Wide Shot)
The view is so far from the subject that he isn't even visible. Often used as an establishing shot.
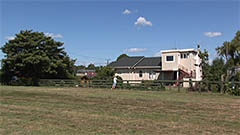
Very Wide Shot
VWS (Very Wide Shot)
The subject is visible (barely), but the emphasis is still on placing him in his environment.
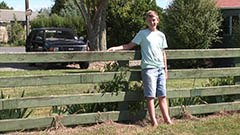
Wide Shot
WS (Wide Shot)
The subject takes up the full frame, or at least as much as comfortably possible.
AKA: long shot, full shot.
Mid Shot
MS (Mid Shot)
Shows some part of the subject in more detail while still giving an impression of the whole subject.
Medium Close Up
MCU (Medium Close Up)
Half way between a MS and a CU.
Close Up
CU (Close Up)
A certain feature or part of the subject takes up the whole frame.
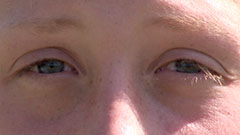
Extreme Close Up
ECU (Extreme Close Up)
The ECU gets right in and shows extreme detail.
Variation: Choker
cut-in
Cut-In
Shows some (other) part of the subject in detail.
Cutaway
CA (Cutaway)
A shot of something other than the subject.
two-shot
Two-Shot
A shot of two people, framed similarly to a mid shot.
over-the-shoulder shot
(OSS) Over-the-Shoulder Shot
Looking from behind a person at the subject.
noddy
Noddy Shot
Usually refers to a shot of the interviewer listening and reacting to the subject.
point of view (POV)
Point-of-View Shot (POV)
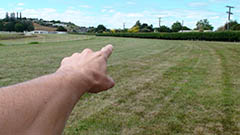
Shows a view from the subject's perspective.
weather shot
Weather Shot
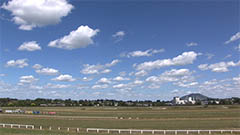
The subject is the weather. Can be used for other purposes, e.g. background for graphics.

Common Lighting Terminology

Ambient LightThe light already present in a scene, before any additional lighting is added.
More info: Ambient Light
Incident LightLight seen directly from a light source (lamp, sun, etc).
Reflected LightLight seen after having bounced off a surface.
Colour Temperature A standard of measuring the characteristics of light, measured in kelvins.
More Info: Colour Temperature Chart
Contrast Ratio The difference in brightness between the brightest white and the darkest black within an image.
More Info: Contrast Ratio
Key LightThe main light on the subject, providing most of the illumination and contrast.
More Info: 3 Point Lighting
Fill LightA light placed to the side of the subject to fill out shadows and balance the key light.
More Info: 3 Point Lighting
Back LightA light placed at the rear of a subject to light from behind.
More Info: 3 Point Lighting
Hard LightLight directly from a source such as the sun, traveling undisturbed onto the subject being lit.
Soft LightLight which appears to "wrap around" the subject to some degree. Produces less shadows or softer shadows.
SpotA controlled, narrowly-focused beam of light.
FloodA broad beam of light, less directional and intense than a spot.
TungstenLight from an ordinary light bulb containing a thin coiled tungsten wire that becomes incandescent (emits light) when an electric current is passed along it. Tungsten colour temperature is around 2800K to 3400K. Also known as incandescent light.
Halogen Type of lamp in which a tungsten filament is sealed in a clear capsule filled with a halogen gas.
FresnelA light which has a lens with raised circular ridges on its outer surface. The fresnel lens is used to focus the light beam.
Incandescent Incandescent lamps produce heat by heating a wire filament until it glows. The glow is caused by the filament's resistance to the current and is called incandescence.

How to Perform a Black Balance


Black balance is an operation similar to white balance. As white balance gives the camera a reference to "true white", black balance gives a reference to "true black". This function is normally available only in professional cameras — home video users don't need to worry about it.

When to Black balance

There seems to be a lot of debate around the subject of black balance, and when it's necessary to perform one. Some people say you should do it every time you white balance, but we also know camera operators who hardly ever do it. Our advice is that it can't hurt to black-balance, and you should definitely do it at the beginning of a shoot, whenever you change filters or gain level, and whenever the lighting conditions change significantly.
A poor black balance usually shows as unnatural or incorrect colours in the dark areas of the picture. If you notice this happening, try performing a black balance.
You will need:
  • A camera with a manual black-balance function. The "black-balance" switch should be located with the "white balance" switch.

How to Black Balance

A black balance is usually done in conjunction with a white balance. The exact sequence varies between operators but this is a common routine:
  1. Perform a white balance first.
  2. Throw the black-balance switch. This should shut the iris down and perform a black balance in much the same way as the white balance. Some cameras may require you to close the iris manually first, and you may need to open the iris again when the operation is complete.
  3. If you like, perform the white balance again, making a sequence of "white - black - white".

Video Camera White Balance

White balance basically means colour balance. It is a function which gives the camera a reference to "true white" — it tells the camera what the colour white looks like, so the camera will record it correctly. Since white light is the sum of all other colours, the camera will then display all colours correctly.
Incorrect white balance shows up as pictures with orange or blue tints, as demonstrated by the following examples:
Correct colour balance.
Correct colour balance
Colour balance is too blue.
Colour balance too blue
Colour balance is too yellow.
Colour balance too yellow
Most consumer-level camcorders have an "auto-white balance" feature, and this is how most amateurs operate. The camera performs it's own white balance without any input from the operator. In fact, very few home-video users are aware of it's existence. Unfortunately, the auto-white balance is not particularly reliable and it is usually preferable to perform this function manually.

Terminology

To confuse the issue, the term "automatic white balance" has two different interpretations. On consumer-level cameras, it means completely automatic. On professional-level cameras, it can mean the white balance operation as described below (which is actually quite manual). This is because in professional situations, a "manual white balance" can mean altering colours using specialised vision processing equipment.
The terminology we use at mediacollege.com is as follows:
"Auto-white" means the completely automatic function (no user input at all).
"Manual-white" means the operation described below.
"Colour correction" means any other method of adjusting colours.

How to Perform a Manual White Balance

You should perform this procedure at the beginning of every shoot, and every time the lighting conditions change. It is especially important to re-white balance when moving between indoors and outdoors, and between rooms lit by different kinds of lights. During early morning and late evening, the daylight colour changes quickly and significantly (although your eyes don't notice, your camera will). Do regular white balances during these periods.
You will need:
  • A camera with a manual white-balance function. There should be a "white balance" button or switch on your camera.
  1. A purpose-designed white balance card is a handy thing. If your camera has a filter wheel (or if you use add-on filters), make sure you are using the correct filter for the lighting conditions.
  2. Point your camera to a pure white subject, so that most of what you're seeing in the viewfinder is white. Opinions vary on just how much white needs to be in the frame - but we've found that about 50-80% of the frame should be fine (Sony recommends 80% of frame width). The subject should be fairly matte, that is, non-reflective.
  3. Set your exposure and focus.
  4. Activate the white balance by pressing the button or throwing the switch. The camera may take a few seconds to complete the operation, after which you should get a message (or icon) in the viewfinder.
    Hopefully this will be telling you that the white balance has succeeded - in this case, the camera will retain it's current colour balance until another white balance is performed.
    If the viewfinder message is that the white balance has failed, then you need to find out why. A good camera will give you a clue such as "colour temperature too high" (in which case change filters). Also try opening or closing the iris a little.

Monday, June 13, 2011

CHOOSING A DIGITAL SLR


Nearly four years ago I wrote a post on choosing a digital camera. Now technology has moved on, technology has got smaller, better (in most cases) and cheaper which means that digital cameras are now cheaper and the chance of getting a digital SLR are now easier.
Now I don’t confess to being a real photography gear geek and know all there is to know about each and every model of camera out there. To be honest, I don’t want to know. I read the odd article in magazines and on the internet, but I prefer to get recommendations from people who have actually used the equipment and give it good reviews.
I do have a few guidelines though when recommending a camera. So here they are. I hope they prove to be useful.
1. Stick with the following brands: Canon, Nikon or Sony. These are the big three brands, well, Sony is catching up and in my opinion is ahead of any of the other brands other than Canon and Nikon, and yes, I use Sony, so I can recommend them based on experience.
So why only choose those three. Well, they are the most popular brands and if you look at any pro photographer whether it’s a wedding photographer or a National Geographic photographer, nine out of ten of them will be using either Nikon and Canon and the other one will probably use Sony. Well, ok, forty nine out of fifty will use Canon or Nikon and the other one will use Sony. So that’s got to prove something hasn’t it?
The other reason is that as more people are using those brands, there will be more second hand equipment available which is always well worth looking at when choosing a digital SLR. Photographers will generally look after their equipment, so the second hand market is always something to consider.
2. Don’t spend all your hard earned cash on the best camera body. The camera lens is very important and can have a big effect on the quality of the image. In some camera plus lens bundles, the lens can be of lower quality with a high quality body. This isn’t always the case but it’s worth doing your homework on both the lens and the body. Don’t just assume the lens is going to be a good one.
3. Do your homework. OK, you’ve seen a few options within your budget, you’ve checked that the lens and body package is a good one, but now you need to check what other people think so it’s time to hit the internet. There are lots of places to find out what other people think about a product. Forums can be good but you have to take a lot of what people say with a pinch of salt. People like to talk about bad experiences a lot more than good experiences so you might see two people say something bad but there could be a hundred people who think the equipment is great.
Reviews are something that you should pay attention to. If a product has had 20 reviews and they are all good reviews, there is a good chance the product is actually pretty good but if they are all bad reviews, then I’d probably steer clear of that product. One handy site I’ve seen is TestFreaks.co.uk as it gathers camera reviews from several web sites into one place. I often use amazon as a source for reviews even though I might not actually buy from them, but it has served me well so far.
So, do your homework and narrow down your choices.
4. Test your options out. OK, so now you narrowed your choice down to maybe three or four options, but so far you’ve not actually held them in your hand. An important factor is confort and ease of use. If you can’t figure out easily where the menu options are, or the dials aren’t easy to turn then you aren’t going to enjoy using the camera. So, unless you know other photographers with those cameras, it’s time to go along to your high street store and try the cameras out. It’s here you have to be strong and not get persuaded by the salesman to buy there and then. If you find the perfect camera though, don’t be afraid to haggle. High street shops are desperate for business so it never hurts to ask. Most shops will price match too so don’t forget to ask.
You’ll notice I haven’t been mentioning any specific camera models in this article and to be honest, I don’t need to. If you set yourself a budget of say 20,000 RS and choose a camera from canon, nikon or sony they are, ready for this, all going to be very similar. To a beginner or someone just starting out with a digital SLR you aren’t going to really notice the differences between them and each one will give you all the tools you need to learn photography and achieve some great images.
So, work out your budget. Work out all the bits you will need like memory cards, a bag etc etc then look at what cameras are available with the cash you have available. Do your homework, read what other people think and test them out if you can and you will pick a camera that will serve you well and let you get out an enjoy photography.

Going to Extremes with Shutter Speed

Going to Extremes with Shutter Speed

As you begin to digest more and more this simple rule of exposure, it will soon become clear that the need to pay attention to what aperture choice or shutter speed choice will in fact lead you to conclude that there is but one truly creatively correct exposure most of the time and this is particularly true as you begin to notice that the world offers up an unlimited supply of motion-filled opportunities. When capturing these motion filled opportunities you will find yourself, more often than not, on either end of the shutter speed spectrum; using fast shutter speeds to freeze the action in crisp sharp detail or using slow shutter speeds and the resulting blur to suggest or imply the motion present. There is rarely a ‘middle ground’ when it comes to the motion-filled world and with that in mind, it won’t be long before you discover that most of your time is being spent on action-filled scenes between 1/500s and 1/1000s OR between 1/4s to 8s.
With my camera and 80-400mm Nikkor zoom mounted on tripod and the lens set to 300mm, I captured Image 9 at f/4 and 1/500s. Image 10 was shot at f/22 and 1/15s. Both exposures are exactly the same in terms of quantitative value, BUT quite different in the arena of ‘creative exposure’. Note how at the wide open aperture of f/4 (Image 9) the splash is frozen in crisp sharp detail but at f/22 (Image 10) that same splash is much more ethereal.
Recording a correct exposure will always be your responsibility, so why not make it a point to make the most deliberately and visually compelling ‘creative’ exposure possible!?

Exercise 2: Motion-Filled Exposures

One of the best lessons I know of is one that I have offered up to countless students over the years in my on-location workshops and at my on-line photography school. It is a very revealing lesson and not surprisingly will lead you further into the world of creatively correct motion-filled exposures. Choose a moving subject, such as a waterfall or a child on a swing or shoot something as simple as someone pounding a nail into a piece of wood.
With your camera set to Aperture Priority Mode, your ISO set to 100, (or 200 ISO if that is the lowest your camera offers) and your aperture set to wide open, (f/2.8, f/3.5 or f/4) take an image of the action before you. You have just recorded an exposure at the fastest possible shutter speed based on the ISO in use, the light that is falling on your subject and of course your use of the largest lens opening. Now stop the lens down one full stop, (if you started at an aperture of f/2.8 then go to f/4 and if your lens starts with f/4 then go to f/5.6) and once again take another exposure of the action filled subject. Repeat this each time with the aperture set next to f/8, then f/11, then f/16 and finally f/22. Each time you change the aperture by what is called a ‘full stop’, your camera does a quick recalculation and offers up the ‘new’ shutter speed to maintain a correct exposure and since you are stopping the lens down with each full stop change in aperture, (making the hole in the lens half as big as it was before) your shutter speed has now doubled in time to compensate, or in other words, your shutter speed is becoming progressively slower. The slower your shutter speed the more likely it is that your action filled subject before you is showing signs of ‘blurring’, since the shutter speed is too slow to ‘freeze it’.

Use of Motion

When capturing this simple composition of an S-curve on Interstate 5 approaching downtown Seattle, I was presented with six possible options of recording a correct exposure, three of which you see here (Images 6, 7, and 8). In terms of their ‘quantitative value’, all three of these images are exactly the same exposure, BUT one can clearly see that they are vastly different in their creative exposure, with the creative emphasis on the use of motion. It has and will always be my goal to present motion-filled opportunities in the most motion-filled way and more often than not when there is a motion filled scene, the longer the exposure time, the greater the motion is conveyed. In our first example, Image 6 was captured at f/4 for 1/2s, Image 7 was shot at f/8 for 2s and Image 8 was shot at f/16 for 8s. All three of these exposures were made with my Nikon D2X and Nikkor 200-400mm zoom at the focal length of 400mm, mounted on tripod with my ISO set to 100 and my WB set to Cloudy.

An exercise such as this is truly eye-opening. The next time you head out the door to shoot city lights at dusk, there won’t be a lot of hesitation on your part about using the slower shutter speeds, since by this example, the slowest shutter speed exposure had the best effect. (I am assuming that you prefer the third image, the image taken at f/22 for 8s and just so there is no confusion, this is not ‘bracketing’ since they are all the same exposure in terms of their quantitative value. I will cover bracketing and other issues related to “where should I take my meter reading” in a future article).

Flower Composition

Head outside with your camera set to 200 ISO and a telephoto lens, say a 200mm, and frame up a flower. Once you focus on the flower, shoot six correct exposures, each one using a different aperture and shutter speed. For example, with the aperture set to f/4, you get a correct exposure indication at 1/1000s. Shoot this one exposure and than move on to f/5.6 and then shoot another at 1/500s, f/8 at 1/250s and another at f/11 at 1/125 second, f/16 at 1/60s and finally another at f/22 at 1/30s. You will soon see that all six exposures are correct in their quantitative value, but radically different in their “visual weight”. Note in just these two examples where the first image was shot at f/5.6 at 1/500 second and the second image shot at f/22 at 1/30s. They are the “same” exposure in their quantitative value, but oh my, look at how much busier the background is in the correct exposure taken at f/22 versus the much cleaner and more isolated flower composition of the correct exposure taken at f/5.6 at 1/500s.
All three of these images are exactly the same exposure (Images 3, 4, and 5). Their quantitative volume of aperture, (light) and shutter speed (duration of time) is exactly the same, yet you can clearly see that visually they are each different. All three photographs were taken with my tripod mounted Nikon D2X and 200mm Micro-Nikkor lens.
Image 3 was taken at f/5.6 at a 1/500 second, Image 4 was taken at f/11 at 1/125s and Image 5 was taken at f/22 at 1/30s. Again, their quantitative values are identical, which is to say that the volume of light that passed through the lens and the amount of time that light was allowed to render an image on the CCD or film was the same. When I composed all three of these images, they looked exactly the same inside my cameras viewfinder. Yet when I reviewed these same three exposures on the camera’s digital monitor, they were clearly different and that difference in this case was with their backgrounds.
In Image 3, the background is limited to subtle out-of-focus tones, color and very few shapes. In Image 4, the background begins to offer up a bit more information in both shapes and sharper tones and by Image 5, it’s ‘clear’ that the background, consists of other nearby flowers due to the much greater defined shapes and tones that are presented. All three are the same exposure, but as is often the case, only one, and sometimes two, are the “creatively” correct exposure.