Friday, July 27, 2012

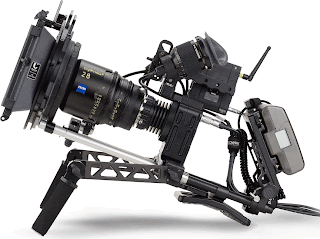
Band Pro to Distribute SI-2K Camera


Silicon Imaging, the developer of the award-winning SI-2K Digital Cinema camera and Stereo 3D recording systems, has named Burbank-based Band Pro Film and Digital to be its exclusive distributor in the United States and Latin America.
“We're very excited about our newest strategic partnership to expand our sales and service for the SI-2K Cinema Cameras,” says Ari Presler, CEO of Silicon Imaging. “The recent success of the Oscar-winning Slumdog Millionaire has opened up new doors and increased demand for our digital acquisition technology. Band Pro will brings their wealth of experience outfitting digital cinema production equipment and will provide best-in-class technical support, education and service to our growing base of TV and film production clients. Their Burbank and New York facilities are centrally located for access to studios and post production facilities leading the digital acquisition and file-based workflow transition.”
The SI-2K camera system offers unprecedented image quality, modularity and instant editing. It offers up to 11 f-stop dynamic range, a Mini remote head for handheld or stereo-3D shooting and Iridas Speedgrade embedded for 3D-LUT and live green screen keying visualization. It records direct-to-disk in 12-bit uncompressed or encoded to CineformRAW AVI or Quicktime files. These files can be immediately placed on the Apple Final Cut timeline and edited with real-time playback without the need for format conversions or proxies.   
Unlike modern HD cameras, which develop and compress colorized imagery inside the camera, the SI-2K streams data as uncompressed raw 'digital negatives' over a standard gigabit Ethernet connection. An Intel Core 2 Duo processor-based computer embedded in the camera, or a laptop tethered up to 100 feet away, process the digital negatives, where they are non-destructively developed and colorized for preview using the cinematographer's desired look.
The SI-2K is fully controlled with an intuitive touchscreen driven display with digital zoom, focus-assist histogram and false-color exposure tools.   The integrated P+S Technik Interchangeable Mount System gives the user the flexibility to use a variety of optics including PL, Nikon F, C-mount, and 2/3” B4 HD lenses for shooting with the Zeiss DigiPrime family. An Optical Viewfinder is available with the B4 Lens mount, as well as, an SVGA OLED Electronic Viewfinder for use with the recorders.
Band Pro offers a host of cine-style accessories for the SI-2K including Chrosziel matteboxes and Follow-Focus systems as well as the world-respected Zeiss DigiPrime and DigiZoom lenses. According to Michael Bravin, Chief Technologist at Band Pro, "The DigiPrimes and DigiZooms provide the SI-2K imager with a clean, high contrast, low flare image, resulting in a spectacular picture and unequaled performance, especially in low light levels and backlit scenes."
“Band Pro has been a leader in bringing high end digital acquisition technology to the market and it was only natural for us to form a relationship with Silicon Imaging,” says Band Pro owner Amnon Band. “The new form of capture and workflow is the next big step in cine technology and Band Pro will, as always, put our usual high standards of technological and educational resources behind every SI-2K camera package.”

Friday, July 13, 2012

How to Create Backlight or Hairlight outdoors with Natural light?


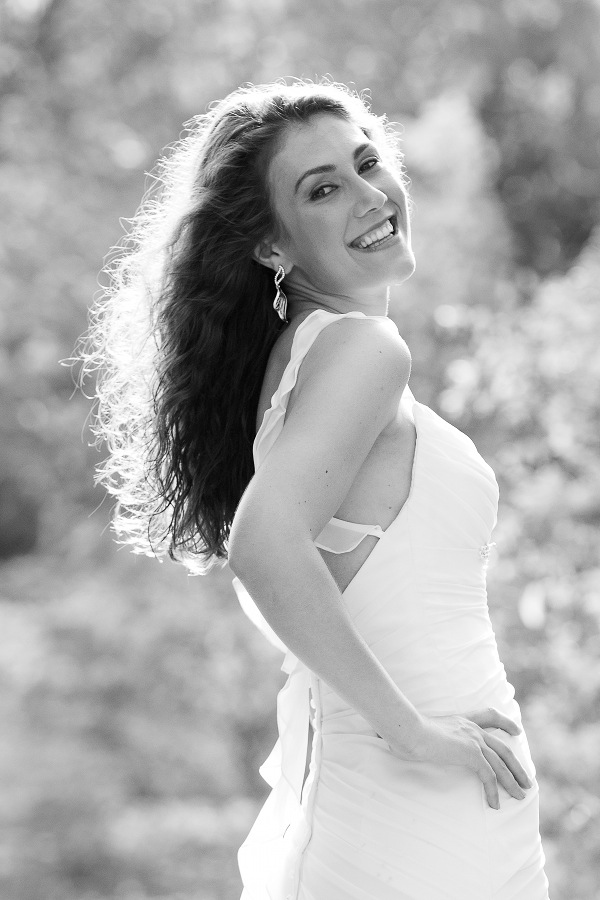
A good portrait is all about contrast. Contrast is the difference between lights and darks or sharps and blurry’s in a single photo. Contrast makes a subject stand out. And isn’t that what we want in a beautiful portrait?
backlight01.jpg
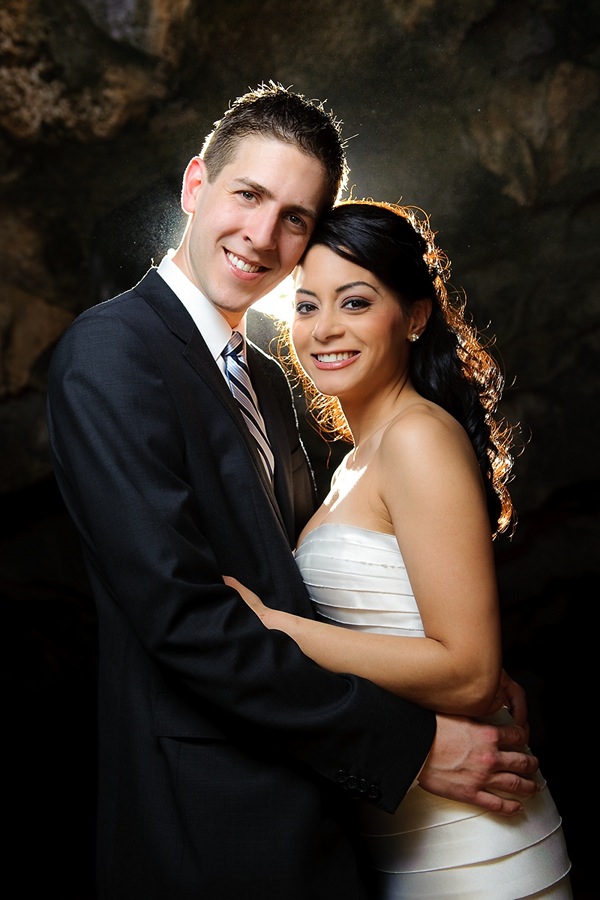
Backlight or Hairlight is a great way to make your portrait subject (a human model) stand out. The light comes from the back (hence the name Backlight) and creates a rim of light around the edges of the subjects hair (hence the name Hairlight). This rim of light creates a perfect border of contrast between the model’s head and the background. So what ingredients do we need to create backlight in a natural outdoor environment?
  1. 1. A source of light, mostly the Sun.
  2. 2. A darkish background.
  3. 3. A good placement of the subject.
  4. backlight02.jpg

    Light Source

    When using the sun as a light source, the light must be coming in from a low angle. This means that we are either in the early or mid morning or in the mid or late afternoon. Because long loose hair will be subject to movement by the wind, it’s best to have the wind going into the direction of the Sun. This means that if the wind is coming from the East, it’s better to shoot in the afternoon, when the Sun is in the West. If the wind is coming from the West, it’s better to shoot in the morning.

    Background

    So we need a darkish background for the rim of light to stand out. It’s not necessary for the background to be very dark, just a little darker than the subject or the surroundings is enough to create the necessary contrast. A dark background could be formed by some trees with dark leaves and shadows, a dark wall or the shadow side of a building, etc. The key is to take some time and look around. If you just give yourself a minute, you will find the best spot.
    backlight03.jpg

    Placement of the Subject

    Now onto the last part of the job: placing your model in the right place. It’s important to get an even distribution of light around the hair. This means that the Sun must be right behind your subject, or just a little off-center. So now we know that the Sun must be in the same direction as your dark background.
    That is the direction that you should be looking at to find your best spot. Now that you found your spot, be sure not to shoot directly into the Sun in order to avoid lens flare (the light that hits your lens directly and causes a blurry haze in your image). A lens hood comes in very handy when trying to avoid lens flare. You may also choose to purposely get lens flare it you want to have that effect in your photo.
    Remember that when shooting a portrait, the most important thing is make your subject look good. So whatever you do to get a nice backlight, don’t forget to pay attention to the other details that you normally take care of. Good luck!


Saturday, July 7, 2012

5 Tips to Shake Up Your Travel Photography


I love to look at travel photography, but man, sometimes it can all just seem mind-numbingly similar.
Put a cabin, some rocks, grass, or sand in the foreground, a lake or ocean in the middle ground, and a sunset or mountain in the background, preferably during a slightly cloudy day.
Shake. Rinse. Repeat.
I do this frequently; everyone does.  But that’s the problem.  Sometimes we need to break away from the formulas of what we think photographs should look like.  We need to think outside of the box and try to do things a little differently.
So here are a few tips and thoughts to help you create unique travel photos.

1.  Forget the stock photos and focus on daily life.

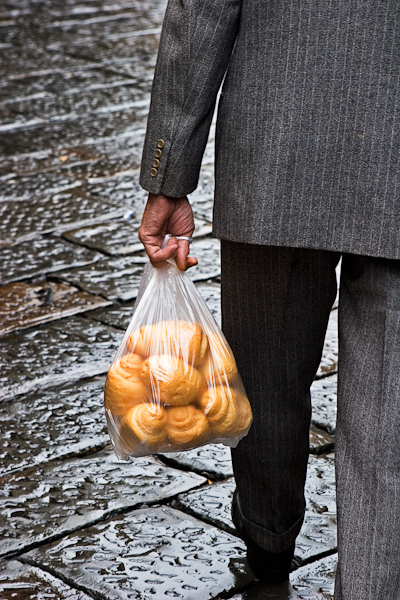
Man with Croissants, Florence
Man with Bread, Florence.
When we’re in a new place, sometimes all we can think about is taking photos of the beautiful architecture, the monuments, and the wonders that we travelled to see.  We have these thoughts from the countless guide books we’ve read and from the imagery we’ve seen over the web.  We want to take those same pictures to have for ourselves (and we should take these photos.)  But these things are not necessarily what gives a place its essence and its soul.
Stop and think about how you feel.  What is it that is creating that feeling?  Is it that tiny, bustling restaurant, lit up at night and filled with regulars?  Is it the well dressed men in expensive suits and shoes riding their bicycles to work?  Is it the chaos and constant traffic on the streets?  Is it the food vendors on the side of the road?  Is it the fresh bread and cheese?
For instance, what describes Italy better?  Is it your typical capture of the Duomo or the Ponte Vecchio, or is it a detail shot of an older man in a well-made suit walking on wet cobblestones and bringing home fresh bread at the end of the day?

2.  Combine the old with the new.

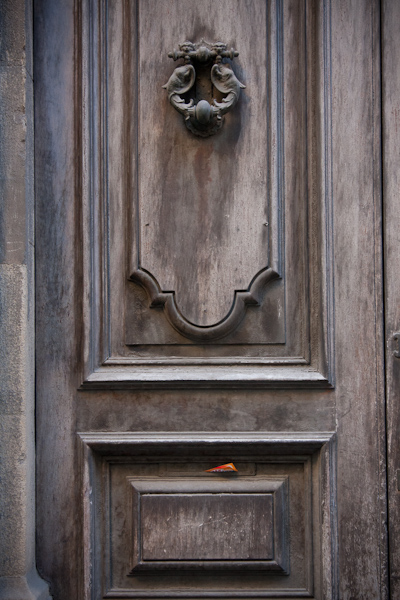
Old Florence Door with Pizza Menu
Old Florence Door with Pizza Menu.
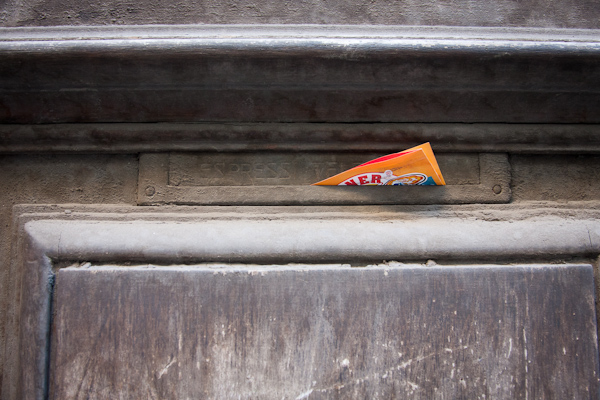
Old Florence Door with Pizza Menu Detail.
Detail Shot.
We all want to photograph another time period.  I would do anything to photograph the Venice or Florence of a couple hundred years ago.  Unfortunately, we can’t and we need to come to terms with that.  If we are walking around searching for only painterly moments that look like they were taken fifty or a hundred years ago then we will miss out on so many fascinating modern and poignant moments.
Try to seek out moments that combine the old and the new – that pay homage to the past but update it with a modern twist, such as the above shot of the old, ornate Florence door combined with the modern pizza delivery menu – a quirky take on a classic city.
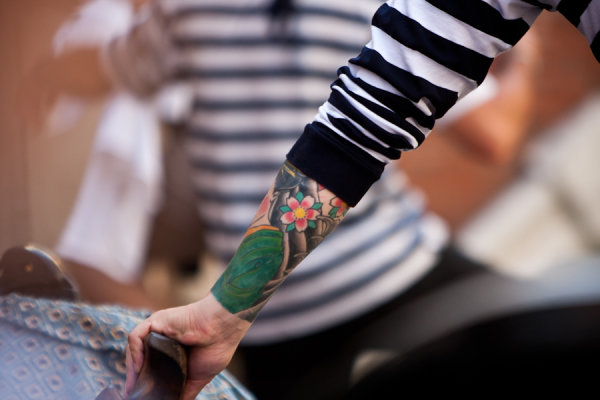
Tattooed Gondolier
Tattooed Gondolier

3.  Turn your camera away from the sunset and shoot a tryptic.

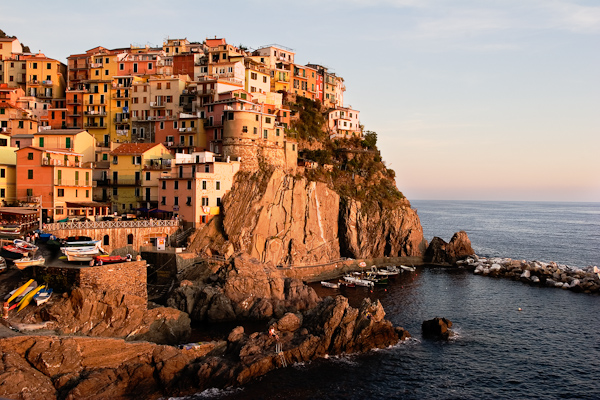
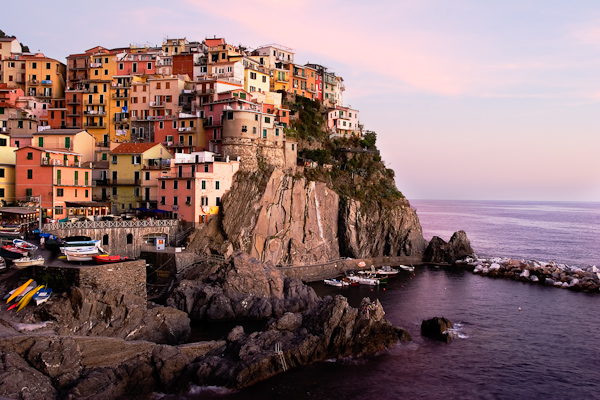
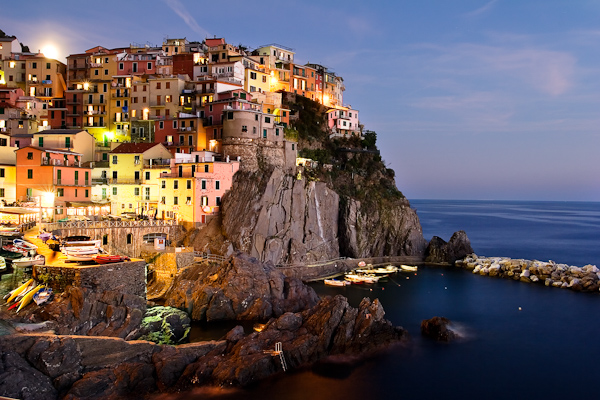
Sunsets are gorgeous but they can also be cheesy.  If you are like me then you’ve shot hundreds of them and they all sit on your harddrive, all looking basically the same.  Instead, turn your camera around and focus the colorful effects of the sunset on the local architecture or landscape.
Then, take this further by creating a tryptic.  Over the course of a couple hours, the light from a sunset will constantly change colors, from orange, to purple, to blue.  Set up a tripod, grab a good book, and take identical shots of your surroundings with different color pallets.  Then, frame them side by side on your living room wall.  They will look stunning.
Manarola Sunset 1
Manarola Sunset 1
Manarola Sunset 2
Manarola Sunset 2
Manarola Sunset 3
Manarola Sunset 3

4. Combine a simple detail shot with a great story.

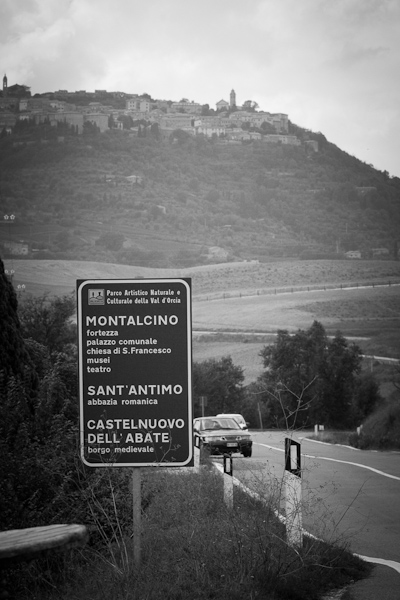
In 2005, I crashed a moped on the swirling roads outside of Siena.  My left arm and my Canon EF 24-70mm F2.8L lens still hold the scars to show for it (both are fine).  You know you’re a photographer when you crash a vehicle and the first thing you do is check to make sure your camera equipment is okay.
The moment when everything went wrong.
Arriving in Montalcino a couple days later and deathly afraid of mopeds, I intelligently decided that it would be a fun idea to rent a crappy bicycle and ride it down one of the tallest hills in all of Tuscany with a tripod and a huge bag of my heavy (and most of it unneeded) equipment.
The ride down was fantastically fun, speeding without ever having to pedal and stopping frequently to photograph the freakish grapes and old wineries.  After a significant amount of time going downhill, however, I suddenly realized that I would eventually have to return the way I came.  By this point I was too far invested and so I kept going downwards and photographed in the surrounding area for the rest of the day.
I returned to the gigantic hill exhausted at the end of the day, 6 kilometers from the top, but psyched myself up to make it up the hill.  I balanced myself on the cheap bike with my lenses and tripod on my back and proceeded to pedal hard and fast and sped up the hill confidently.  A minute of this confident pedaling later and my muscles froze.  I stopped, rolled off the bike, and proceeded to gingerly walk up the hill.  The next few hours were a miserable pattern of 5 minutes of walking and 30 seconds of riding.  I finally arrived at the town late in the evening starving, exhausted, and numb but euphorically relieved.
Unfortunately, I would soon realize that all of the restaurants had closed for the night and food was nowhere to be found.

5.  Capture the Locals.

Dock Worker, Sikinos
Ultimately, it is the locals that give most destinations their true feeling, so go out and capture them!  Hang around in a busy area for an hour and do some people watching.  Capture the locals candidly as they go about their everyday lives.  Mix these shots with your shots of the local architecture, the details of daily life, the monuments and of your personal stories and you will have a more complete document of the destination when you return.
The point of this list of tips was not to say that you shouldn’t take the typical travel photos.  That’s just not true.  But you should also try to push yourself outside of the norm whenever possible.  Try to create the type of photos that stand out and are unique.


Wednesday, July 4, 2012

Black Magic Cinema Camera


blackmagiccinemacamera.png

Add the timeless beauty of feature film quality to your production work

Elegant, sophisticated and jam packed with the latest digital cinema technology, Blackmagic Cinema Camera gives your work that timeless feature film look! Blackmagic Cinema Camera features an amazing 2.5K image sensor with a wide 13 stops of dynamic range for a true digital film camera. You get a built-in SSD recorder, popular open standard uncompressed RAW and compressed file formats, compatibility with quality EF and ZE mount lenses, LCD touchscreen monitoring plus metadata entry, all packed into an exciting hand held design!


Move to Digital Film

Blackmagic Cinema Camera features a high resolution sensor with wide dynamic range so it’s perfect for independent film, television commercials and episodic television production. DaVinci Resolve software for Mac™ and Windows™ is included so you can work at the highest quality and get the best results. Blackmagic Cinema Camera is both affordable and a complete solution because it includes a built-in recorder and monitoring, so it’s perfect for displacing video-only cameras for work such as sporting events, weddings, music videos and more!


13 Stop Dynamic Range

Regular video cameras clip video so you are locked into images that look cheap. Blackmagic Cinema Camera eliminates this problem as it captures a super wide dynamic range of 13 stops into 12-bit DNG files, so your images look truly cinematic. This preserves detail in both shadows and highlights, and even handles indoor shots while keeping the details of any images captured through windows. This means you keep all sensor data so you can make creative decisions during DaVinci Resolve color grading!

Premium Quality

Building one of the finest cameras in the world requires attention to every detail. Blackmagic Cinema Camera’s premium quality design features a machined aluminum chassis, interchangeable optics, high resolution 2.5K sensor, 13 stops of dynamic range and 12-bit RAW uncompressed and compressed file formats! Every aspect of the image path has been totally optimized for quality, so this means you always get the quality you need for the most demanding work.

EF Compatible Lens Mount

With Blackmagic Cinema Camera you can use the most amazing optics from the world’s leading lens crafters such as Canon, Zeiss and many more. Blackmagic Cinema Camera is compatible with EF and ZE mount lenses, so you can use the lenses you already own! With Blackmagic Cinema Camera you are not locked into any specific lens and you can choose the lens you need based on the creative style of your shot! Blackmagic Cinema Camera allows full electronic control of your lens, so you can simply point, set iris and focus on command!


Metadata Entry

Blackmagic Cinema Camera is the first camera to feature built-in metadata entry so your files include information compatible with popular editing software. This dramatically speeds up the whole post production process! Entering metadata is easy. Simply tap the capacitive LCD touchscreen to display the slate where you can enter information such as shot number, search tags, scene number, timecode and more! You can even set shot number and other data to increment automatically!

Built-in SSD Recorder

Blackmagic Cinema Camera features a built-in SSD recorder that allows 2.5K uncompressed CinemaDNG RAW 12-bit capture as well as Apple ProRes and Avid DNxHD compressed video formats. All file formats are open standard and used by NLE software so you get the only camera designed from the ground up to be part of a whole post production workflow! When you’ve finished shooting, simply connect the SSD to your computer and edit or color your shots straight from the disk!


HDR Photography


1.png
HDR Photography has been around since the days of film, but has become extremely popular in recent years. High Dynamic Range, or HDR, is essentially a way of processing photos that allows for a wider and deeper range of colors. This type of processing makes an image appear much closer to what the human eye sees as opposed to what your camera’s sensor allows. In example, the photograph above shows the natural rich colors of the building as well as the natural rich colors of the sky. Without HDR, the sky could either be well exposed and the building silhouetted, or the building well exposed and the sky blown out. Creating an HDR photo however will allows both elements to appear natural and rich in color.
One method of making an HDR photograph is to combine multiple images with different exposures together. This tutorial will explain how this photo was created and in using the same process, how you can create your own HDR photos.
Step 1. Bracketing Your Subject
Bracketing is done when several shots of the same subject are taken with varying exposures. This can be used for almost any occasion or type of photography and is a good way to ensure that you’ve gotten the shot you wanted when you sit down to edit. For example, you will set your camera on a tripod and take one shot at 1/200 another at 1/400 and another at 1/80. Now you have 3 different shots of the same image, but each shot will have a different exposure. Each setting and subject will vary obviously when it comes to bracketing, but many cameras have a built in bracketing feature that will do the work for you.
For this photo there are only two key elements, the building and the sky. So the first shot that will be taken will be to get a proper exposure of the sky:
2.png
As was mentioned above, the sky is well exposed but the building is silhouetted. This was taken with a faster exposure to ensure the colors of the sky would be rich and deep as opposed to blown out.
Now the second shot will be taken to get a proper exposure of the building:
3.png
The building is well exposed in this shot, but again, the sky is blown out. This was taken at a slower shutter speed in order to reduce the silhouette effect the bright sky gives.
Now that we have our two images, we will combine them to get the best of both.
Step 2. Combing the Photos
Photoshop is a great tool to use in HDR photography because it is fairly easy to combine photos. So let’s bring both images into Photoshop.
4.png
The photo with the correct exposure for the building (left) will be moved on top of the photo with the correct exposure for the sky (right).
5.png
Now that the photos are layered on top of each other we will combine the two. Our top layer has a well-exposed building and a blown out sky, so let’s remove the sky of this image. In order to remove the sky we will first select the top layer, and then choose the magnetic lasso tool. With the magnetic lasso tool we will select the entire sky. This is where an ok HDR photo can turn into an awesome HDR photo. The more time you put into being exact and making sure that you don’t miss any pieces, the better and more natural your photo will look.
6.png
Then we simply hit the delete key and voila! Our well exposed sky replaces the blown out sky.
7.png
The photo is then put into Lightroom and edited a bit more…
8.png
HDR photography can have some amazing results if done correctly. The key is to not go to the extreme and combine dozens of photos leaving every pixel of the photo well exposed. Leave room for natural shadows and use moderation when combining images.

Friday, June 22, 2012

Aperture


In optics, an aperture is a hole or an opening through which light travels. More specifically, the aperture of an optical system is the opening that determines the cone angle of a bundle of rays that come to a focus in the image plane. The aperture determines how collimated the admitted rays are, which is of great importance for the appearance at the image plane. If an aperture is narrow, then highly collimated rays are admitted, resulting in a sharp focus at the image plane. If an aperture is wide, then uncollimated rays are admitted, resulting in a sharp focus only for rays with a certain focal length. This means that a wide aperture results in an image that is sharp around what the lens is focusing on and blurred otherwise. The aperture also determines how many of the incoming rays are actually admitted and thus how much light reaches the image plane (the narrower the aperture, the darker the image for a given exposure time).
An optical system typically has many openings, or structures that limit the ray bundles (ray bundles are also known as pencils of light). These structures may be the edge of a lens or mirror, or a ring or other fixture that holds an optical element in place, or may be a special element such as adiaphragm placed in the optical path to limit the light admitted by the system. In general, these structures are called stops, and the aperture stop is the stop that determines the ray cone angle, or equivalently the brightness, at an image point.
In some contexts, especially in photography and astronomy, aperture refers to the diameter of the aperture stop rather than the physical stop or the opening itself. For example, in a telescope the aperture stop is typically the edges of the objective lens or mirror (or of the mount that holds it). One then speaks of a telescope as having, for example, a 100 centimeter aperture. Note that the aperture stop is not necessarily the smallest stop in the system. Magnification and demagnification by lenses and other elements can cause a relatively large stop to be the aperture stop for the system.
Sometimes stops and diaphragms are called apertures, even when they are not the aperture stop of the system.
The word aperture is also used in other contexts to indicate a system which blocks off light outside a certain region. In astronomy for example, aphotometric aperture around a star usually corresponds to a circular window around the image of a star within which the light intensity is assumed.

In photography


The aperture stop of a photographic lens can be adjusted to control the amount of light reaching the film or image sensor. In combination with variation of shutter speed, the aperture size will regulate the film's or image sensor's degree of exposure to light. Typically, a fast shutter speed will require a larger aperture to ensure sufficient light exposure, and a slow shutter speed will require a smaller aperture to avoid excessive exposure.
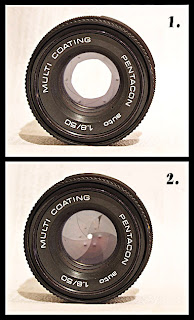
Diagram of decreasing aperture sizes (increasing f-numbers) for "full stop" increments (factor of two aperture area per stop)
A device called a diaphragm usually serves as the aperture stop, and controls the aperture. The diaphragm functions much like the iris of the eye – it controls the effective diameter of the lens opening. Reducing the aperture size increases the depth of field, which describes the extent to which subject matter lying closer than or farther from the actual plane of focus appears to be in focus. In general, the smaller the aperture (the larger the number), the greater the distance from the plane of focus the subject matter may be while still appearing in focus.
The lens aperture is usually specified as an f-number, the ratio of focal length to effective aperture diameter. A lens typically has a set of marked "f-stops" that the f-number can be set to. A lower f-number denotes a greater aperture opening which allows more light to reach the film or image sensor. The photography term "one f-stop" refers to a factor of √2 (approx. 1.41) change in f-number, which in turn corresponds to a factor of 2 change in light intensity.
Aperture priority is a semi-automatic shooting mode used in cameras. It allows the photographer to choose an aperture setting and allow the camera to decide the shutter speed and sometimes ISO sensitivity for the correct exposure. This is sometimes referred to as Aperture Priority Auto Exposure, A mode, Av mode, or semi-auto mode.
Typical ranges of apertures used in photography are about f/2.8–f/22 or f/2–f/16, covering 6 stops, which may be divided into wide, middle, and narrow of 2 stops each, roughly (using round numbers) f/2–f/4, f/4–f/8, and f/8–f/16 or (for a slower lens) f/2.8–f/5.6, f/5.6–f/11, and f/11–f/22. These are not sharp divisions, and ranges for specific lenses vary.

Virtual Studio


The term virtual studio can refer to any number of technological tools which seek to simulate a physical television and/or movie studio. One such use of the term follows.
virtual studio is a television studio that allows the real-time combination of people or other real objects and computer generated environments and objects in a seamless manner. For that integration we will use chromakey technology. A key point of a virtual studio is that the real camera can move in 3D space, while the image of the virtual camera is being rendered in real-time from the same perspective, therefore, this virtual scene has to adapt at any time to the camera settings (zoom, pan, angle, traveling, etc.). This is what differentiates a virtual studio from the traditional technique of chromakey. It also differs from techniques used in film, in which scenes are edited later. A virtual studio does not need any post production because it is in real-time.
There exist many technical solutions for creating virtual studios, but most of them include the following components:
  • Camera tracking, that uses either optical or mechanical measurements to create a live stream of data describing the exact perspective of the camera.
  • Realtime rendering software, that uses the camera tracking data and generates a synthetic image of a television studio.
  • A video mixer, which combines the video from the camera with the video from the realtime rendering software to produce a final video output. One of the most common ways to mix the video to replace a chroma key background.
A major difference between a virtual studio and the bluescreen special effects used in movies is that the computer graphics are rendered in realtime, removing the need for any post production work, and allowing it to be used in live television broadcasts.

Sunday, April 15, 2012

Composing Your Shots


Home Video Hints: Composing Your Shots

Shooting great looking video can be as simple as solving a few problems with composition.
The key to good-looking video is a well-composed shot. What exactly is composition? Technically, composition is the relationship between two or more objects in a picture, where one of the objects shows dominance. This involves careful placement of your subject in your shot so that it looks good and grabs the attention of your audience. In this column, we will provide a list of common composition problems and their solutions.

Shaky Shots

Problem: Your footage is shaky and difficult to watch.
If you have to hand out Dramamine before showing your videos to friends, you might suffer from shaky cam syndrome. Tromboning (using the zoom too often like the slide of a trombone), hosing (panning the camera back and forth like a fire fighter) and constant stopping and starting movements all are symptoms of this problem.
Solution: Compose a shot, roll tape and hold still.
You should always compose your shots before you push the record button. Once you press record, hold the shot for at least five seconds before moving the camera. If you do have to move the camera or zoom, do it slowly and deliberately without stopping until the movement is completely done. Always know where you want to move the camera next, and plan your moves before you make them. It is easier to hold wide shots steady than telephoto shots. For best results, zoom out to the widest angle your lens permits and move closer to your subject.

The Slippery Slope

Problem: Your shots are tilted, making your subjects look like they might slide out the side of the picture.
This problem is obviously caused by the camera being tilted sideways at an angle. It doesn't have to be a very big angle to distract your viewers. Is the water in that gorgeous sunset over the lake running out of the side of your shot? If so, you may be sliding down the slippery slope of composition.
Solution: Check your horizontal and vertical surfaces in the shot to make sure the picture is level.
The real key to this solving this common error is to pay attention to the frame while you shoot. Find a building, doorway or some other straight and vertical or horizontal object and use it as a guide to keep your picture straight and level. If you are shooting a horizon, especially one with a perfect edge like a lake or the ocean, line the surface up with the top or bottom of the viewfinder and then carefully tilt back to compose your shot. Try to place your horizon on the top third of the picture or the bottom third depending on what is more important, the sky or the foreground. Never depend on the leveling bubble on the tripod, which only shows the tripod to be level and doesn't account for the parts of the tripod and camera above the level. Therefore, you should only use the leveling bubble as a quick reference point.

Manual Focus


Getting Started: Manual Controls

Sometimes it pays to be a control freak
Automation is nice. Heat sensing microwaves that can tell how long to heat leftovers, say, are very convenient. But sometimes you need to override the automatic settings to cook things just the way you like them.
The same holds true for camcorders. While most camcorders automatically adjust the focus, audio levels, shutter speed and iris to ambient conditions, your videos might look better if you override some of your unit's features and take control of your shots.
But with everything set automatically, why bother? Well, you may encounter situations where your camcorder, for all its technological wizardry, just can't make heads or tails of what's going on. Or you may want to create a visual effect that goes against the grain of your camcorder's automatic sensibilities.
In any case, taking control of your camcorder's functions is simple enough.

Manual Focus

Generally speaking, your camcorder determines focus by finding a well-defined object in your frame--typically whatever is in the center of your shot--and using that as a reference point for deciding how to focus.
Regardless of how handy autofocus can be, there are situations when your camcorder finds it difficult to locate the subject of your shot. When there's not enough light, perhaps at night or in a dimly lit room, objects tend to blend into one gray mass as far as the camcorder can tell.
Your camcorder, desperately trying to locate the subject of the shot, goes in and out of focus rapidly. With manual control, you can use your eye, which is infinitely more sensitive to light than your camcorder, to focus the shot instead.
Manual focus allows you to add certain effects to your video. For example, there is a manual focus technique called rack focus that camera operators use to bring the foreground and background alternatively in and out of focus. Racking focus allows you to direct the viewers' attention within a given shot by focusing on different objects successively, each time blurring the other parts of the shot.
You've probably seen this technique in a movie or television program: a close-up shot of the telephone, sitting on the edge of the desk, ringing off the hook. The background is blurred just enough to obscure it. The camera operator then slowly shifts focus from the telephone to the background where a man sits in an easy chair. As the man comes into focus, the phone blurs.
You may want to blur your shot as a segue from one segment to another. You can create a unique transition from shot to shot by ending and beginning each shot out of focus. One gray blur looks pretty much like another; by blurring your shots this way, you can cut from shot to shot creating an interesting in-camera transition effect.
How do you switch from auto to manual focus? Most units have a button somewhere on the camcorder that will toggle autofocus on and off. You'll have to consult your manual for the specifics regarding your camcorder.
The convenient thing about autofocus is that when you turn it back on, your shot will automatically focus itself. This is useful if, as I described above, you want to begin your shot blurry and rapidly bring it back into focus. Use manual focus to blur your subject first, then after a few seconds of recording the blurred image, turn the autofocus back on again. Your subject will come into sharp focus as your camcorder takes over for you.

Saturday, March 31, 2012

PRIMO ZOOMS


The Primo® Zoom is the only family of zoom lenses that are built to specifically compliment the color and performance of the Primo Prime lenses. 

Optically, the family of Primo® Zoom Lenses combines high contrast and resolution, even field illumination and negligible veiling glare, ghosting and distortion. The overall performance of the Primo® Zoom, including matched color balance to the full range of Primo prime lenses, makes for seamless intercutting of shots from primes to zoom. Because of the great flexibility and excellent imaging performance of the Primo® Zoom, they are suitable for all types of production and are intended to be used for both zooming and at fixed focal lengths.
 
4:1 Primo Zoom - SLZ
 
Introduced in 1988, the 4:1 Primo Zoom is T2.3 with a focal length range of 17.5-75mm. Its speed makes it an ideal choice for low level, night cinematography. The lens maintains a constant aperture at all zoom and focus positions. It has continuous close focusing to macro 1:6 with a minimum distance of 2½ feet. There is minimal breathing when focusing at short focal lengths.  
 
The overall performance of the 4:1 zoom, including matched color balance to the full range of Primo prime lenses, makes for seamless intercutting of shots from primes to zoom. Because of the great flexibility and excellent imaging performance of this lens, it is suitable for all types of production and is intended to be used for both zooming and at fixed focal lengths. With the optional Primo 1.4x extender it  becomes a 24.5-105mm, T3.2 lens with a 1:4 macro magnification and a close focusing distance of 2 feet 10inches.
 
As with all Primo lenses, focus, T-stop and zoom scales are engraved on both sides of the lens.
 
 
11:1 Primo Zoom – SLZ11
 
Introduced in 1993, the 11:1 Primo Zoom is a high ratio, high performance zoom. With an aperture of T2.8 and a focal length range of 24-275mm, it has become an essential tool for nearly every production. The lens maintains a constant aperture at all zoom and focus positions. It has continuous close focusing to macro 1:3.5 with a minimum distance of 4 feet. There is minimal breathing when focusing at short focal lengths (24mm-60mm). 
 
The overall performance of the 11:1 zoom, including matched color balance to the full range of Primo prime lenses, makes for seamless intercutting of shots from primes to zoom. Because of the great flexibility and excellent imaging performance of this lens, it is suitable for all types of production and is intended to  be used for both zooming and at fixed focal lengths. With the optional Primo 1.4x extender, the lens becomes a 34-395mm, T4 lens with a 1:2.5 macro magnification and a close focusing distance of 4 feet 1 inch. As with all Primo lenses, focus, T-stop and zoom scales are engraved on both sides of the lens.
 
 
3:1 Primo Zoom – SLZ3
 
Introduced in 1994, the 3:1 Primo Zoom is a high speed, high performance telephoto zoom, with an aperture of T2.8 and a focal length range of 135-420mm. The lens maintains a constant aperture at all zoom and focus positions. It has continuous close focusing to macro 1:6 with a minimum distance of 8 feet. There is minimal breathing when focusing at short focal lengths (135mm-200mm). 
 
The overall performance of the 3:1 zoom, including matched color balance to the full range of Primo prime lenses, makes for seamless intercutting of shots from primes to zoom. Because of the great flexibility and excellent imaging performance of this lens, it is suitable for all types of production and is intended to  be used for both zooming and at fixed focal lengths. With the optional Primo 1.4x extender the lens becomes a 190-595mm, T4 lens with a 1:4 macro magnification and a close focusing distance of  8 feet 7 inches. As with all Primo lenses, focus, T-stop and zoom scales are engraved on both sides of the lens.
 
 
Primo Macro Zoom - PMZ
 
Introduced in 2001, the Primo Macro Zoom is T2.2 with a focal length range of 14.5-50mm, and is a versatile zoom lens that can replace a set of close-focus primes. It combines wide angle zooming and continuous close focusing in a compact, lightweight design weighing only 9.5 lbs.  It utilizes two aspheric elements, making it the most advanced Primo zoom in the series. 
 
The color and performance is matched to the Primo prime and zoom lenses, and the Macro zoom also covers Super 35 format over its entire zoom range and down to 15 inches close focus. This lens will not accept any lens extender attachments. Includes MBPMZ Primo® Macro Zoom clip on matte box. As with all Primo lenses, focus, T-stop and zoom scales are engraved on both sides of the lens.
 
 
All Panavision Zoom lenses are equipped with a silent, high torque motor and include zoom controls and cables.