
I love to look at travel photography, but man, sometimes it can all just seem mind-numbingly similar.
Put a cabin, some rocks, grass, or sand in the foreground, a lake or ocean in the middle ground, and a sunset or mountain in the background, preferably during a slightly cloudy day.
Shake. Rinse. Repeat.
I do this frequently; everyone does. But that’s the problem. Sometimes we need to break away from the formulas of what we think photographs should look like. We need to think outside of the box and try to do things a little differently.
So here are a few tips and thoughts to help you create unique travel photos.
1. Forget the stock photos and focus on daily life.
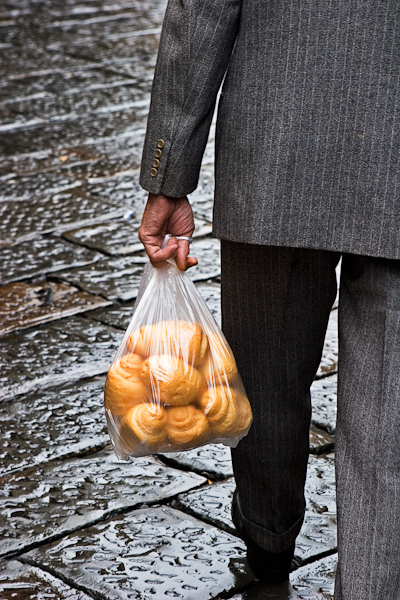
Man with Bread, Florence.
When we’re in a new place, sometimes all we can think about is taking photos of the beautiful architecture, the monuments, and the wonders that we travelled to see. We have these thoughts from the countless guide books we’ve read and from the imagery we’ve seen over the web. We want to take those same pictures to have for ourselves (and we should take these photos.) But these things are not necessarily what gives a place its essence and its soul.
Stop and think about how you feel. What is it that is creating that feeling? Is it that tiny, bustling restaurant, lit up at night and filled with regulars? Is it the well dressed men in expensive suits and shoes riding their bicycles to work? Is it the chaos and constant traffic on the streets? Is it the food vendors on the side of the road? Is it the fresh bread and cheese?
For instance, what describes Italy better? Is it your typical capture of the Duomo or the Ponte Vecchio, or is it a detail shot of an older man in a well-made suit walking on wet cobblestones and bringing home fresh bread at the end of the day?
2. Combine the old with the new.
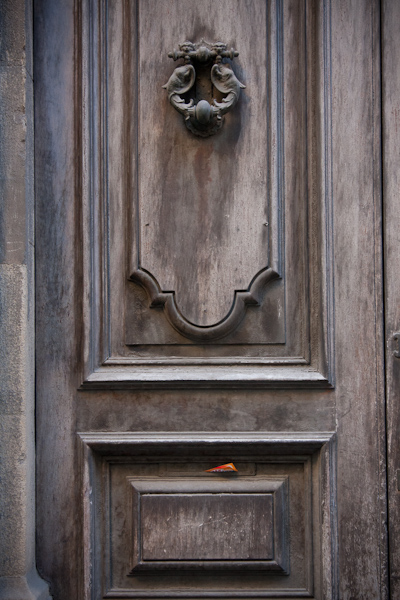
Old Florence Door with Pizza Menu.
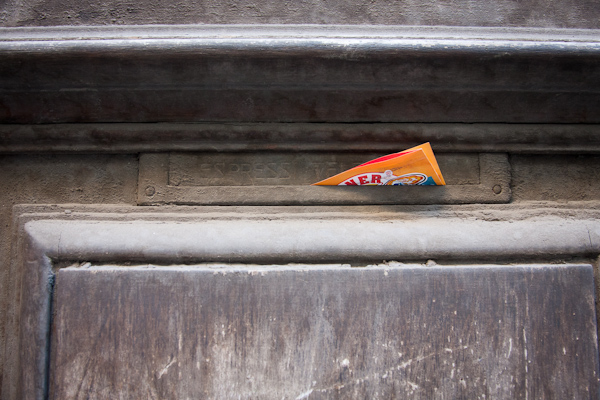
Detail Shot.
We all want to photograph another time period. I would do anything to photograph the Venice or Florence of a couple hundred years ago. Unfortunately, we can’t and we need to come to terms with that. If we are walking around searching for only painterly moments that look like they were taken fifty or a hundred years ago then we will miss out on so many fascinating modern and poignant moments.
Try to seek out moments that combine the old and the new – that pay homage to the past but update it with a modern twist, such as the above shot of the old, ornate Florence door combined with the modern pizza delivery menu – a quirky take on a classic city.
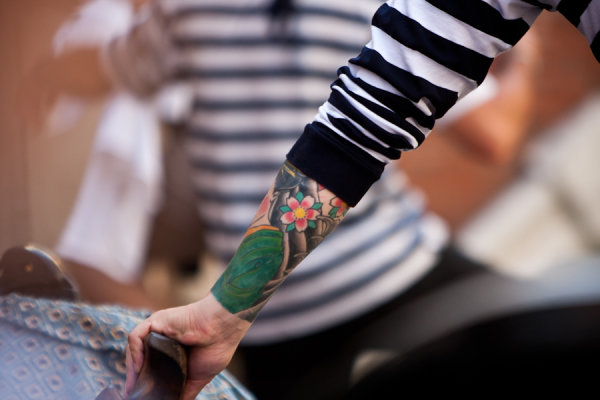
Tattooed Gondolier
3. Turn your camera away from the sunset and shoot a tryptic.
Sunsets are gorgeous but they can also be cheesy. If you are like me then you’ve shot hundreds of them and they all sit on your harddrive, all looking basically the same. Instead, turn your camera around and focus the colorful effects of the sunset on the local architecture or landscape.
Then, take this further by creating a tryptic. Over the course of a couple hours, the light from a sunset will constantly change colors, from orange, to purple, to blue. Set up a tripod, grab a good book, and take identical shots of your surroundings with different color pallets. Then, frame them side by side on your living room wall. They will look stunning.
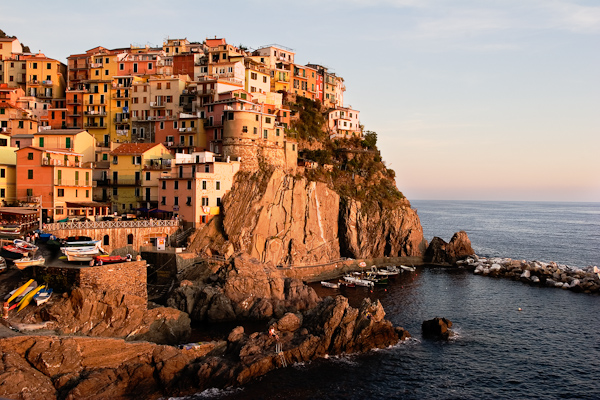
Manarola Sunset 1
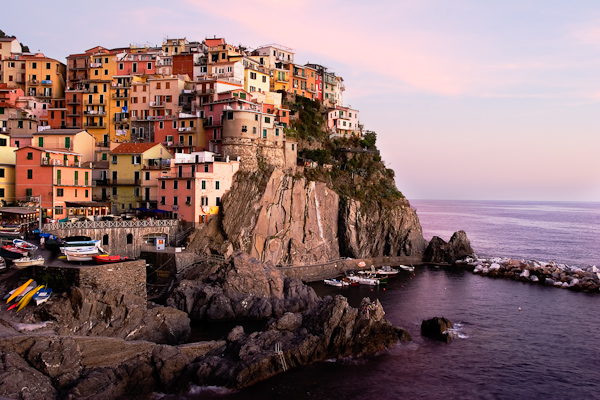
Manarola Sunset 2
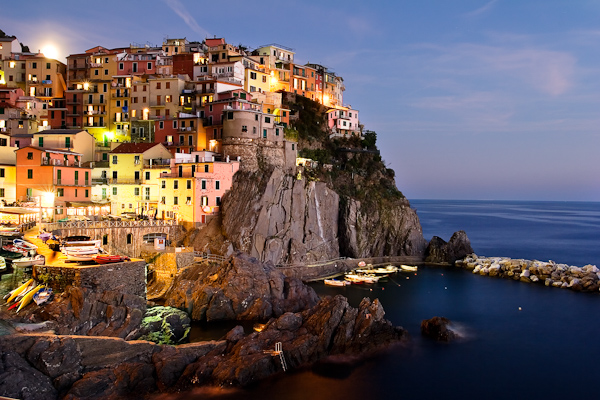
Manarola Sunset 3
4. Combine a simple detail shot with a great story.
In 2005, I crashed a moped on the swirling roads outside of Siena. My left arm and my Canon EF 24-70mm F2.8L lens still hold the scars to show for it (both are fine). You know you’re a photographer when you crash a vehicle and the first thing you do is check to make sure your camera equipment is okay.
The moment when everything went wrong.
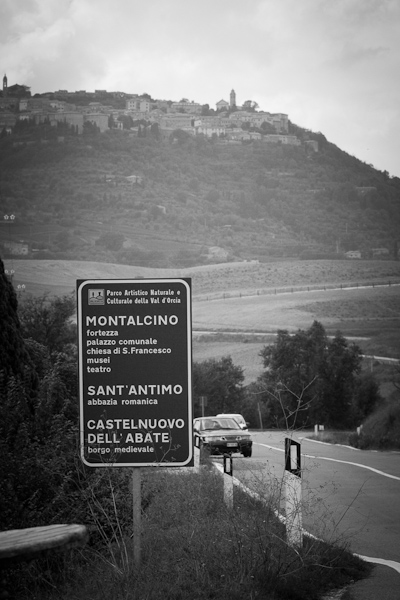
Arriving in Montalcino a couple days later and deathly afraid of mopeds, I intelligently decided that it would be a fun idea to rent a crappy bicycle and ride it down one of the tallest hills in all of Tuscany with a tripod and a huge bag of my heavy (and most of it unneeded) equipment.
The ride down was fantastically fun, speeding without ever having to pedal and stopping frequently to photograph the freakish grapes and old wineries. After a significant amount of time going downhill, however, I suddenly realized that I would eventually have to return the way I came. By this point I was too far invested and so I kept going downwards and photographed in the surrounding area for the rest of the day.
I returned to the gigantic hill exhausted at the end of the day, 6 kilometers from the top, but psyched myself up to make it up the hill. I balanced myself on the cheap bike with my lenses and tripod on my back and proceeded to pedal hard and fast and sped up the hill confidently. A minute of this confident pedaling later and my muscles froze. I stopped, rolled off the bike, and proceeded to gingerly walk up the hill. The next few hours were a miserable pattern of 5 minutes of walking and 30 seconds of riding. I finally arrived at the town late in the evening starving, exhausted, and numb but euphorically relieved.
Unfortunately, I would soon realize that all of the restaurants had closed for the night and food was nowhere to be found.
5. Capture the Locals.

Dock Worker, Sikinos
Ultimately, it is the locals that give most destinations their true feeling, so go out and capture them! Hang around in a busy area for an hour and do some people watching. Capture the locals candidly as they go about their everyday lives. Mix these shots with your shots of the local architecture, the details of daily life, the monuments and of your personal stories and you will have a more complete document of the destination when you return.
The point of this list of tips was not to say that you shouldn’t take the typical travel photos. That’s just not true. But you should also try to push yourself outside of the norm whenever possible. Try to create the type of photos that stand out and are unique.


